
Staking your crypto currency is one of the best ways to make some passive income. But it is also important to choose the right project and delegator to maximize the benefits. However, if you have decided to stake ODIN tokens, you have surely made the right decision. ODIN is one of the best projects that is capable of bringing huge benefits to the holders. It is considered an extremely beneficial financial bridge for its market holders. Although ODIN staking can be beneficial, it can be an overwhelming process for most people. So, if you are the one having some issues with staking ODIN, this guide is for you. We have formulated the whole staking process in four simple steps to make it extremely straightforward for most people.
Let’s get started.
STEP 1: Purchasing ODIN Protocol
Purchasing ODIN protocol is the first and the most important step before staking the ODIN token. The purchasing can be done by following the below-mentioned steps.
- a. You need a crypto wallet (for example metamask). You can go to metamask.io and create an account there.
- b. Buy Bnb from binance
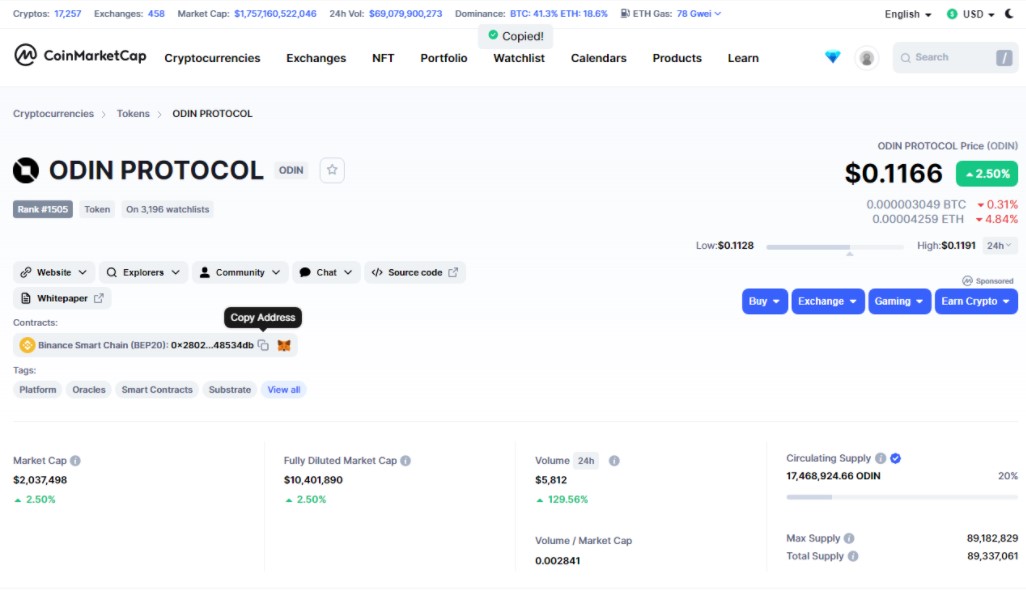
- c. Go to coinmarketgap and copy the ODIN protocol token.
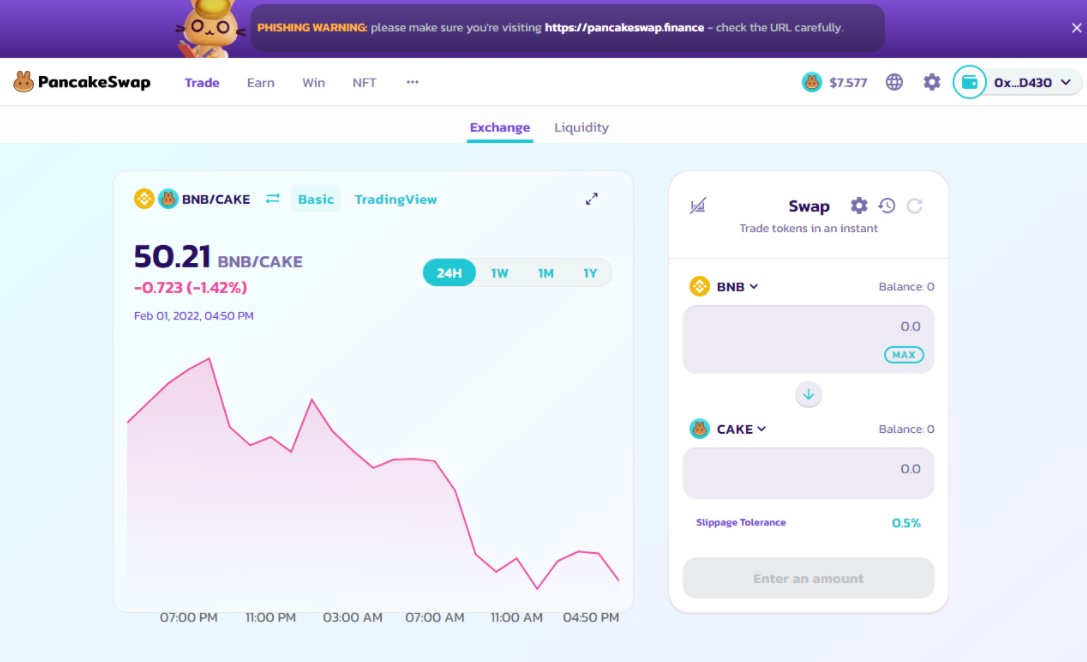
- d. Then create an account at pancakeswap.finance and connect your metamask to it.
- e. Then go to trade now option at pancakesawap and select exchange. You will see the below mentioned image once you do that.
- f. Click on the cake option and paste the copied token.
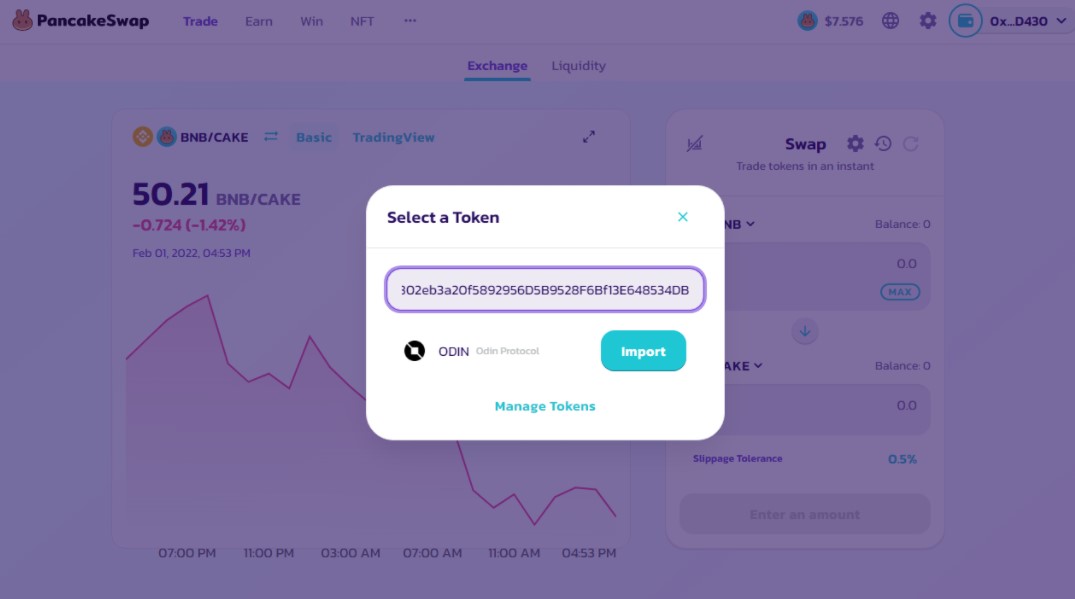
- g. After that you just need to enter the amount for which you want to buy the token and confirm the transaction.
STEP 2: Creating Accounts with The Wallet
After you have purchased the ODIN tokens, you need to begin depositing them to your wallet by following some simple steps.
- a. Download Keplr wallet from google extension (install it and create an account).
- b. Make sure you are connected to the ODIN wallet (You can do that by selecting the dropdown from the top of the wallet).
- c. Go to (moveto.odinprotocol.io) where you will realize that your ODIN address is already present there. If not you can copy the address from keplr and paste it.
- d. Make sure right address is selected.
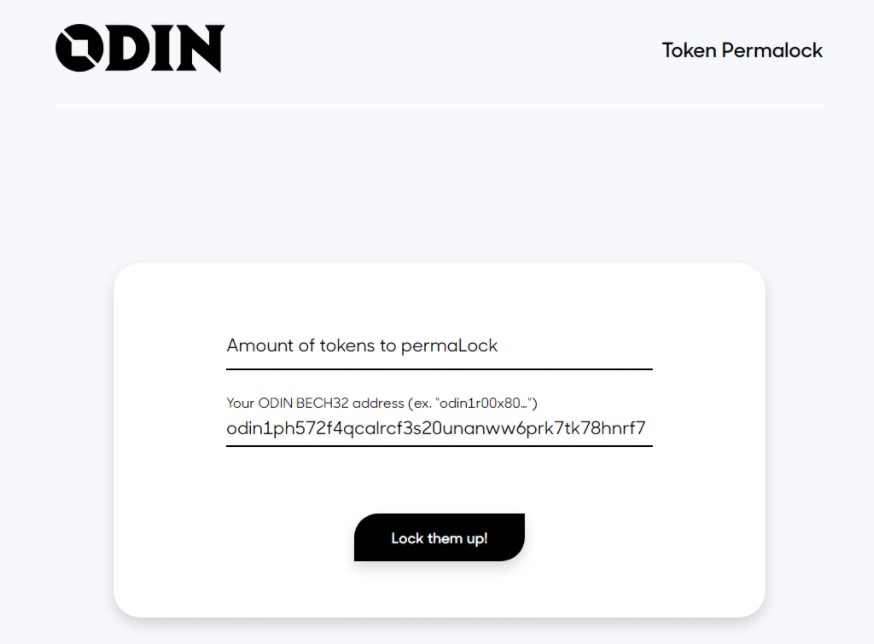
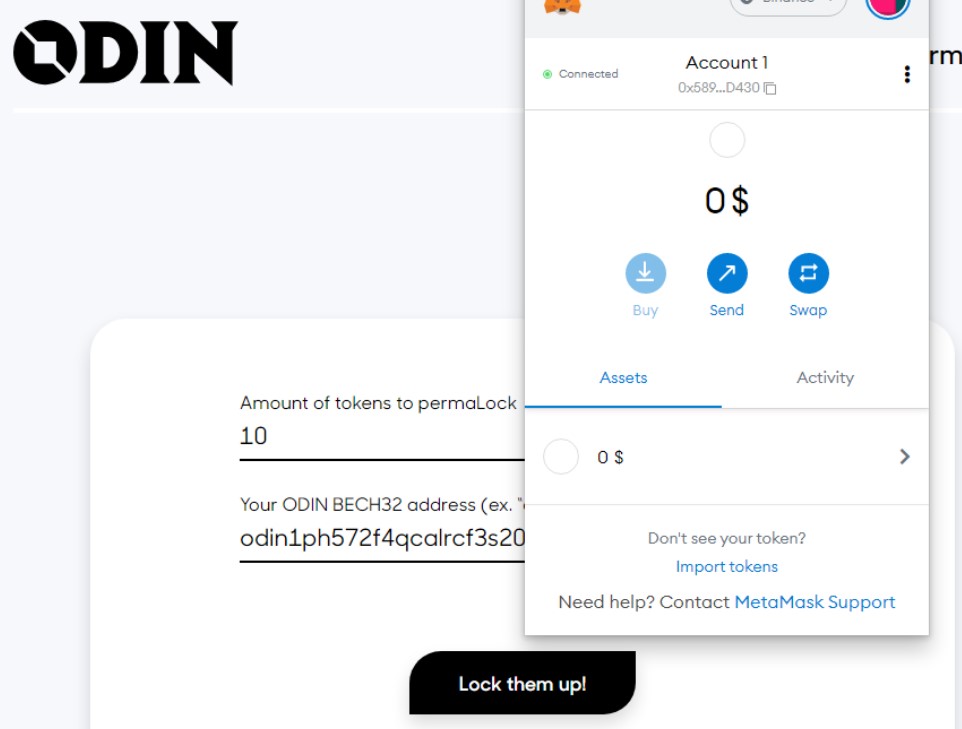
- e. Add the number of tokens you want to stake.
- d. Now confirm the tokens you want to lock up by adding the amount.
- f. After you do this, you will have a notification from metamask and you just need to accept it.
- g. Once you accept the transaction, the wallet will take some time to get the job done and will send you a link to bscscan to confirm the transaction.
- h. Now you have to wait for some time and the transaction will be done. After sometime you will realize that the ODIN token has been added to your Keplr wallet.
- g. You can confirm the transaction by going to Binance (BNB) Blockchain Explorer (bscscan.com)
The contract will take some time to confirm the transaction. But it is completed within 24 hours most of the time.
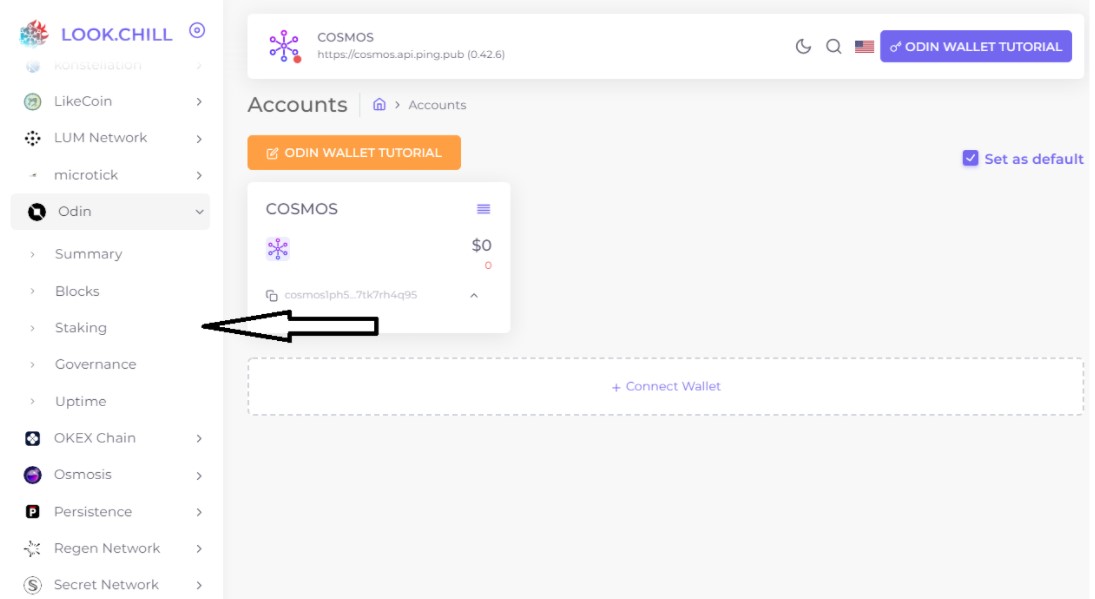
STEP 3: Sending the ODIN Tokens to The Wallet
Now that you have created an account with the wallet and have purchased the token, you just need to add them to your wallet.
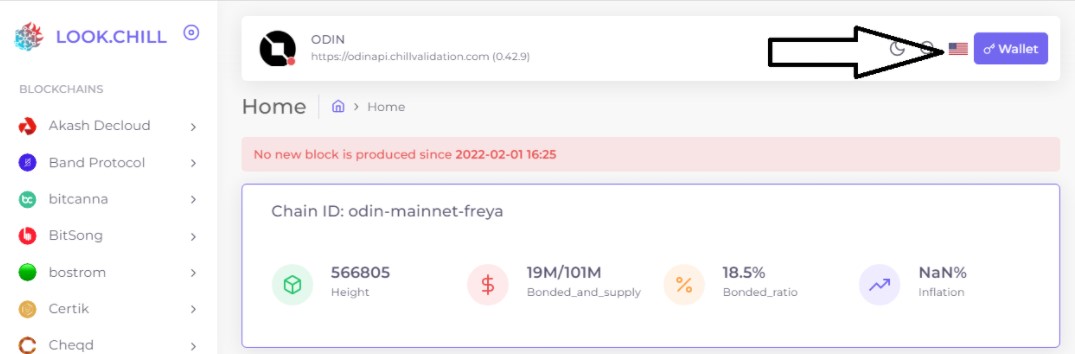
- a. Go to look.chillvalidation.com
- b. Then choose the ODIN from the present options.
- c. After selecting the ODIN option, you need to connect the ODIN wallet.
- d. Connect using the actual address only instead of selecting the keplr.
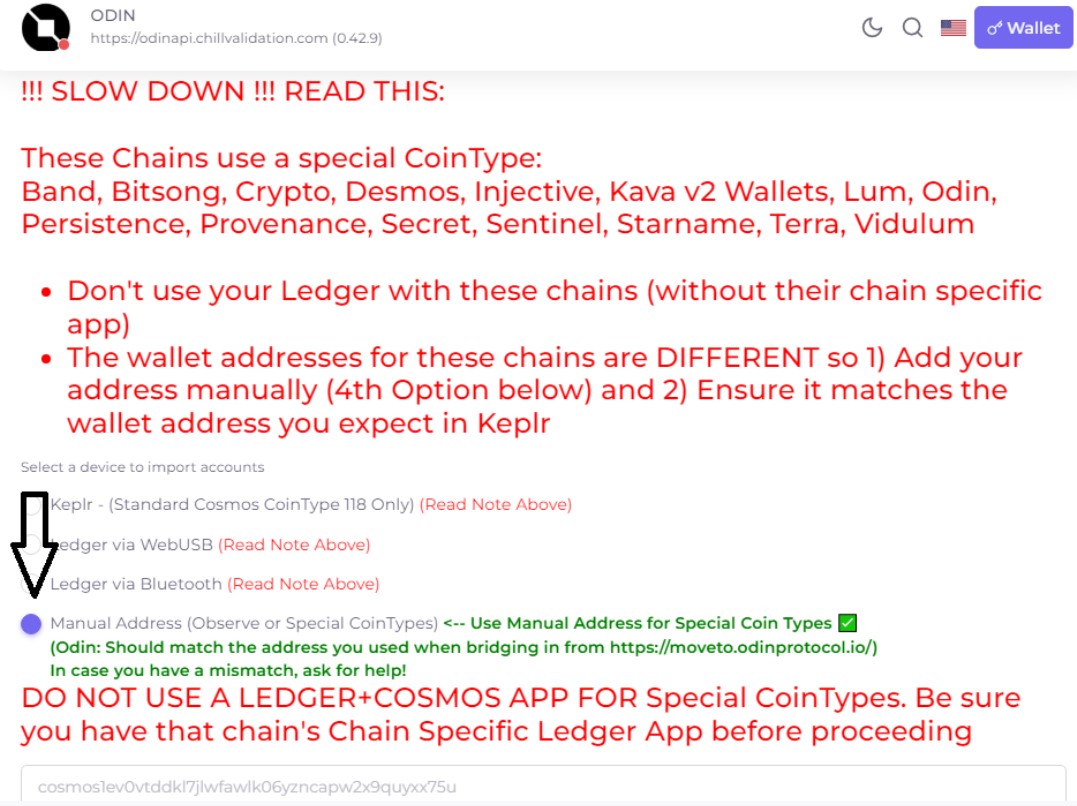
- f. Copy the address from the keplr extension and paste it on.
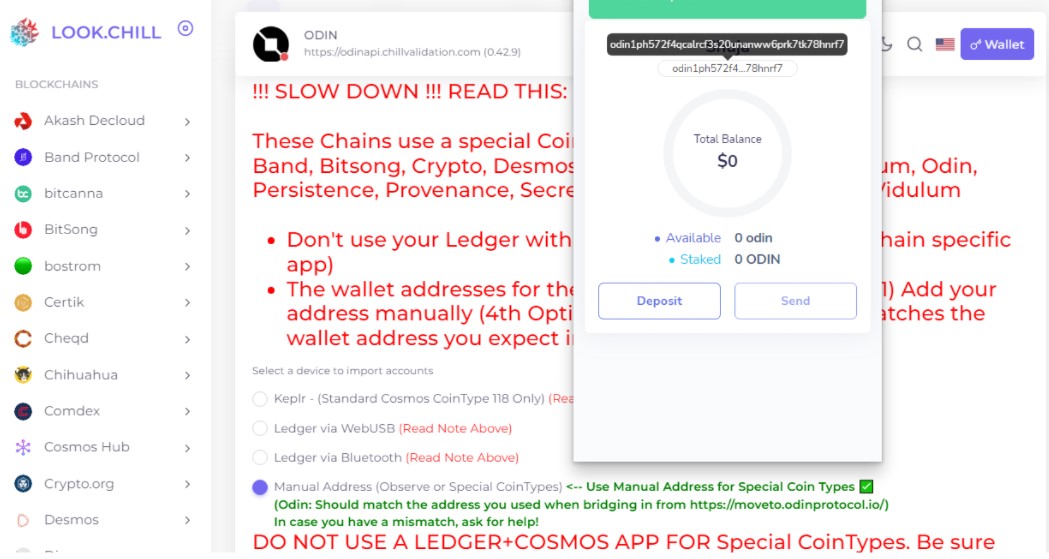
- g. Select the name and save the wallet (In our case, we have selected ODIN Wallet Tutorial).

- h. Then, click next and save that.
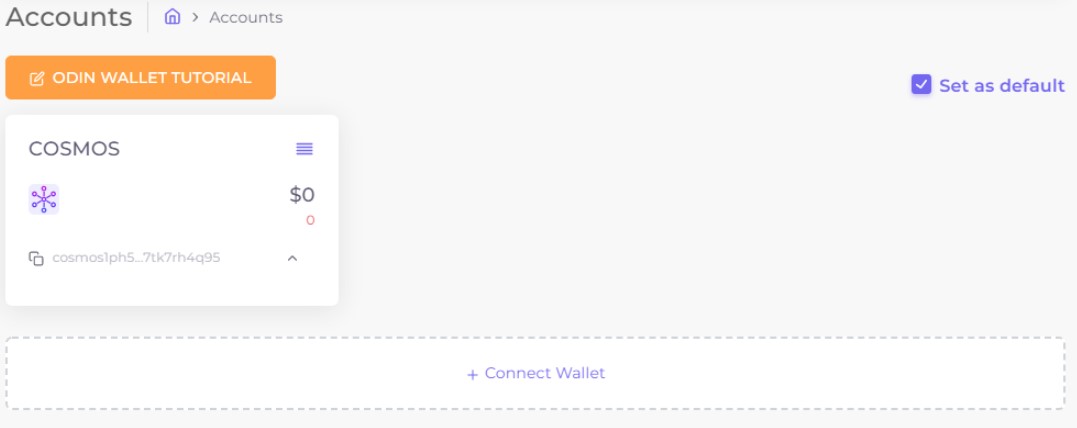
These steps will make sure that you have all the ODIN tokens added in your wallet
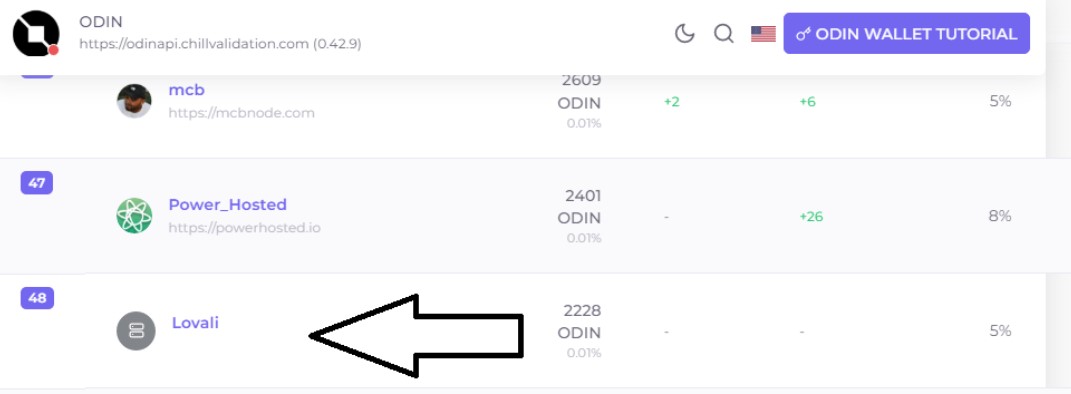
STEP 4: Delegating with the Node
Now, once you have added all the tokens in your wallet, you just need to stake them. For that purpose, you can follow the below-mentioned steps.
- a. Go to ODIN in the left hand menu and select stake from the drop down.
- b. Choose “Lovali” from all the available nodes.
- c. Select delegate.
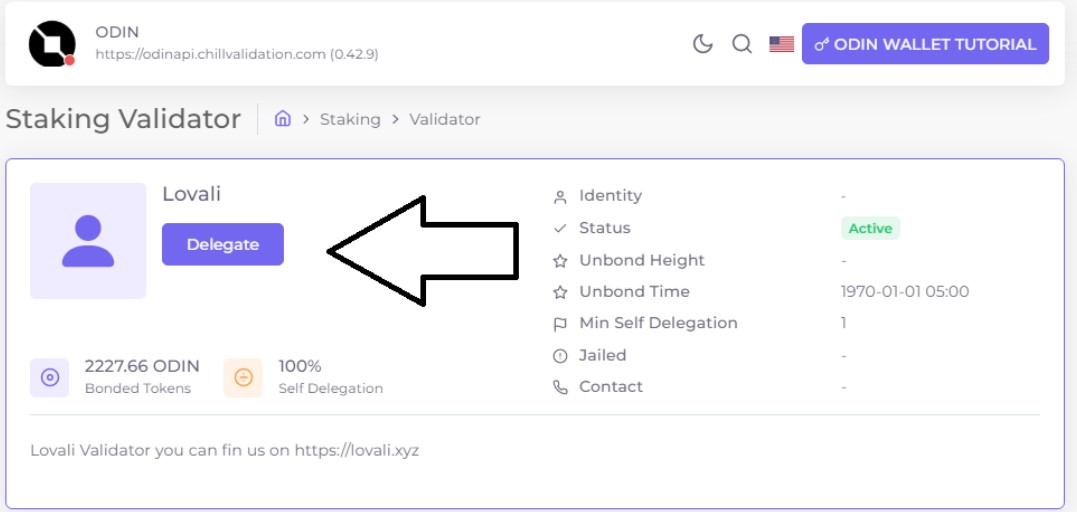
- d. Now choose the token that you manually created and enter the amount of ODIN token that you want to stake.

- e. Make sure you have some remaining as they will be deducted as the service fees.
- f. Select Keplr from the available options.
- g. Approve the dialogue box.
- h. Now to confirm your staking please click on the keplr extension to confirm your staking.